Coral background

Showing posts with label Crafts. Show all posts

Monday, February 13, 2012

Valentine's Kisses of the Non-Chocolate Variety

My sweet, sweet boyfriend loves all things plain. Vanilla ice cream without toppings, plain cheeseburgers, cookies void of icing and sprinkles. Rice krispy treats, however, (plain mind you, they can't be crazy with chocolate or other sweets intermingled) are by far his favorite. Honestly, I'd never made them until a few months ago when I made (read: failed at making) turkey rice krispy treats for Thanksgiving. He did his best to help me, but they were a dud. So in honor of Valentine's Day, I decided to make him plain rice krispy treats with a cute flair.
I made the treats first, nothing fancy, just 6 cups of rice krispy cereal, a bag of mini-marshmallows, and a stick of butter. Then, I sprayed a funnel with cooking spray and stuffed about 2 tablespoons(ish) of the rice krispy treat mixture into it, packing it tightly. I plopped the treats out onto my countertop and worked on shaping them to make them into more of a Hershey kiss shape. I mostly made smaller sized treats, but went all out on a couple of them and made them nearly as big as the funnel itself. I was worried that I would have to work super fast to make sure the treats were formed before the mixture started to set up, but I was surprised that I really didn't have to rush (plus, I had my friend, Lauren, helping out which made the process go faster).
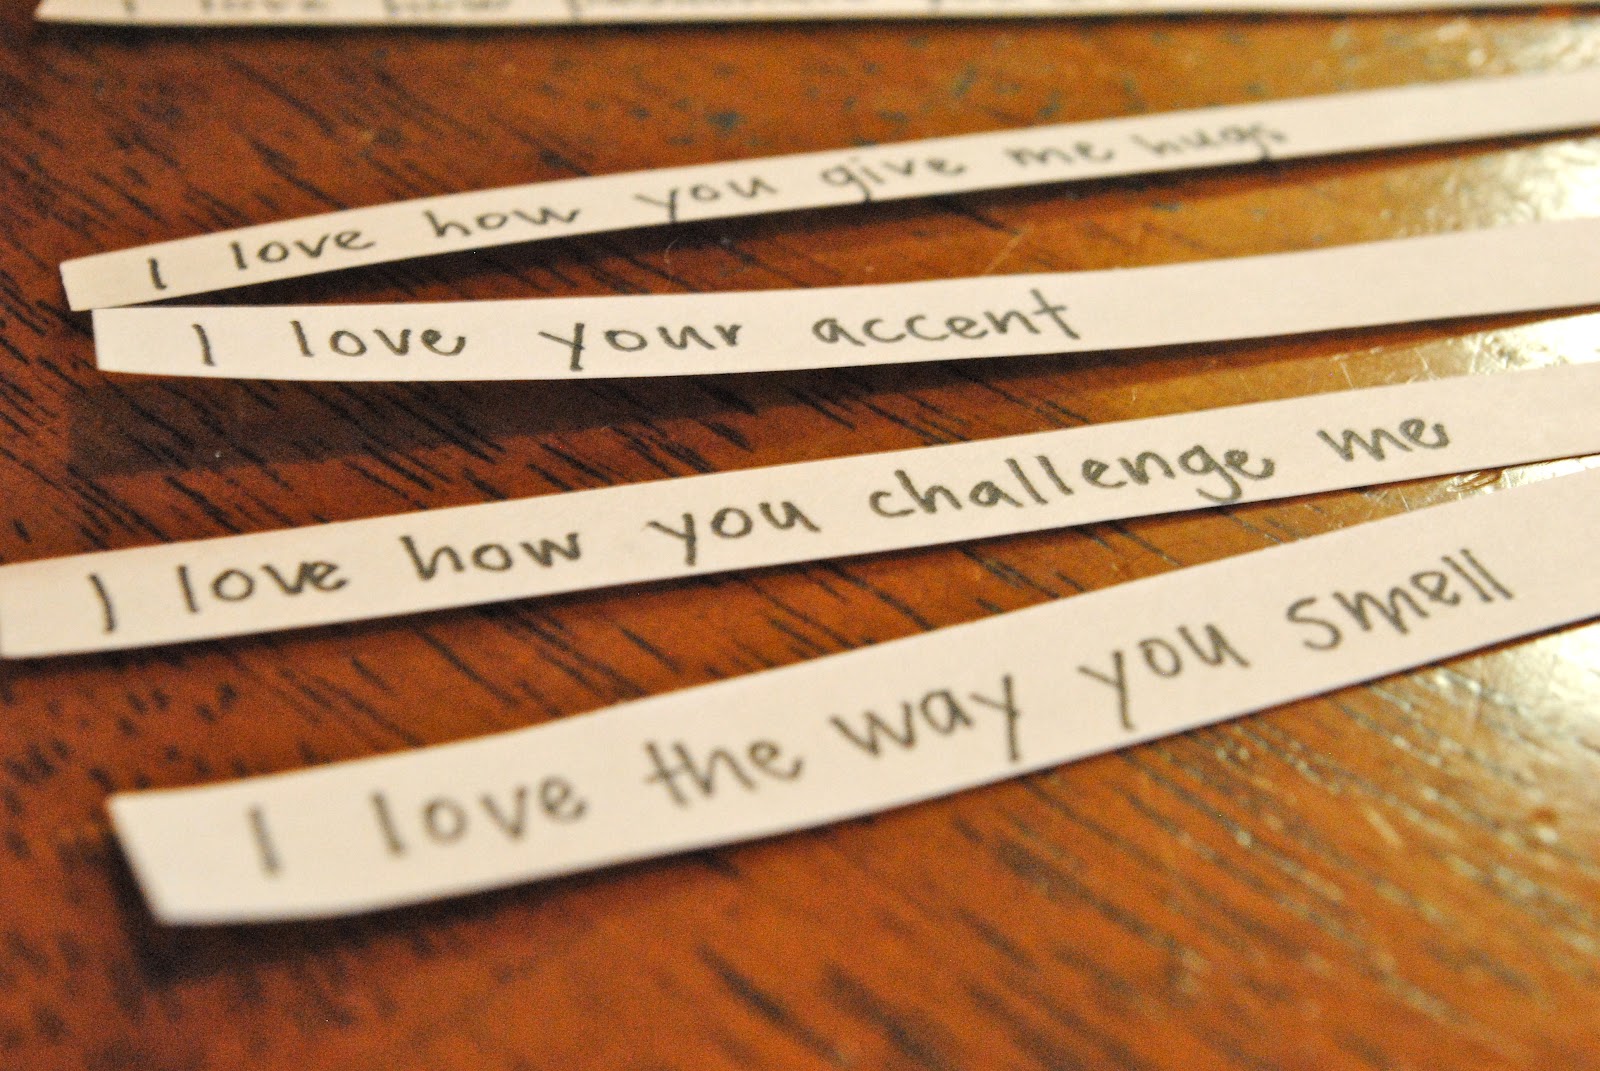
While the treats were setting up, I made tags for each treat with reasons why I love my valentine :) Some were sweet and serious, but some were silly.
I wrapped the treats up in aluminum foil, securing the paper within the foil.
I was so thrilled with how they turned out! It was definitely a hit!

Saturday, December 24, 2011

Festive (& Easy) Christmas Cards

Getting presents on Christmas is awesome. It's such a sweet reminder of the greatest gift we've been given - the Gospel. But let's be real, everyone loves getting a sweet card before opening their Christmas gifts. So, since you're probably hanging out, waiting for time to pass like myself until tomorrow morning, whip up some of these cute cards to go along with your presents!

Here are a few of the ones I made:


Yes, you did just see Hello Kitty cards. Yes, I'm almost 21 years old. Don't judge. I love Hello Kitty, I hate cats. My life is a paradox. 

Here are some card-crafting tips:
Use lots of different papers - both patterned and plain, and layer them. You can add some detail by using fun scrapbook scissors as well (but don't get crazy).
Use pre-made goodies like these if you aren't looking to spend lots of time making cards. I got these super awesome HK 3-D stickers from the dollar section at Target.
Add dimension! Not only did I use layered stickers, I used these nifty pop-up adhesive dots to add interest to the cards.
Use different textures! I added rick-rack and ribbon to most of the cards. It's a super simple detail that really adds a lot. I also used foam stamps with acrylic paint to throw in another texture.

For the cards themselves I used pre-cut cardstock cards with envelopes. It saved me from cutting out cards & assembling envelopes.

Happy crafting & Merry Christmas :)

Friday, December 23, 2011

Homemade Lotion

If you're on Pinterest, you've probably seen homemade lotion from Patchwork Times. It's supposed to be pretty awesome so I decided to try it out. 

It only takes 3 ingredients:16 oz. baby lotion (I used 18 because each bottle has 9 oz.), 8 oz. vitamin E cream, 8 oz. Vaseline. Check, check, and check.
I just measured the ingredients out (remember 8 oz. in a cup!) and got to blending.
I blended the ingredients for about 4-5 minutes, long enough for it to resemble icing. Unfortunately I didn't bring my KitchenAid home so I had to use my mother's ghetto mixer :(

I used the bottles everything came in to repackage the lotion. You could totally get crafty and give this away as a gift in cute mason jars with fabric covered lids.

Overall, I liked the lotion. I was afraid it would be too thick and greasy from the Vaseline and vitamin E but it wasn't! And, it smelled like babies. Some might see this as a draw back, I saw it as a plus. If you're not into smelling like an infant, you could try out Johnson & Johnson's other baby lotions - they have vanilla and lavender varieties.

Monday, September 12, 2011

Headboard Making 101

This summer I had multiple projects going for my impending move to an apartment. I painted 7 (yes, 7) pieces of furniture and made some pretty adorable canvases for the living room. One of the many projects was a fabric covered headboard. It was overall pretty simple (especially since my craft wizard of a mother had already made one) and only took a few hours once we got all the supplies we needed. 

You'll need 
  • Fabric (I got 3 yards, enough for the headboard, plus some to tie the fabric in elsewhere in the room) 
  • Plywood
  • Craft paper
  • Skil saw
  • Sandpaper 
  • Batting
  • Staple gun
I picked out this kelly green, fleur-de-lis fabric. If you're interested in making a headboard, definitely go with a larger print. 
We measured the width of my bed (about 54 inches) and cut the fabric accordingly, leaving about 6 inches on either side for ample fabric to staple to the headboard. 
Next, we measured craft paper the size we wanted the headboard to be and cut it. 
Watch out, this step is super precise and scientific... err, except not. After we cut the craft paper, we took the rug from our foyer and used it as a template for the curvature of the headboard.
We traced the shape of the rug...
Then, I free-handed what I wanted the edges of the headboard to look like.
We found the center of the craft paper and folded the paper in half. 
With the paper folded, we cut along our outline, making a craft paper version of what became the headboard.
We taped it to a piece of plywood and made sure it was level and even and whatnot. Then, we traced the outline onto the plywood.
Using a Skil saw, we cut the headboard out of plywood.
Here it is! Just a little rough around the edges.
Hence, the sanding.
Next, we took sheets of batting and wrapped them around the plywood, one at a time.
We used this type of batting. One sheet of it was big enough to go over the entire piece of plywood. 
After stapling a lot of batting around the headboard, we stapled our fabric to it, making sure it was pulled tight.
And here's the finished product! I really love the pattern and shape - its not too busy, but not too plain, its just right.
The great thing about fabric headboards is you can hang them as high or as low above the bed as you'd like, making it the focal point of the room or leaving space for artwork. 

Friday, July 1, 2011

I'm Getting Old.

I'm old enough to plan a bridal shower... for someone that I grew up with... who's my age. Crazy. Cool. Weird. Crazy.

My mom and I made all the decor for the shower and went for a whimsical feel. We broke out the Cricut and started cutting.
We cut out these scolloped circles (about 1.5 inches in diameter) for cake toppers. We used 3 different patterned papers, but made sure to keep two of the patterns relatively simple. 
We cut out 1 inch "D's" and, using a thin brush, lightly glued the letters onto the circles. Once they were dry, we glued toothpicks to the base of the circles. They ended up looking like flowers, which was really fun. We definitely used the flower feel to our advantage. 
We also made bigger versions of the cake toppers which displayed the couples initials. Each of the "flowers" was a different size and were staggered in height. For the stems, we used dowel rods cut to different lengths. 
We put the rods into terracotta pots and topped them with brown shredded paper. 
We used the "flower pots" as centerpieces for the main food table as well as in the foyer of our fellowship hall. They were way cheaper than flowers and so much cuter and more whimsical! 
We were going to buy corsages for the bride & groom but then decided to make paper flower corsages to keep the theme consistent. They ended up turning out really well!
In order to put the flowers on, we glued a circa 1987 pin to the back of the paper. For some odd reason, my mom had THREE "Jesus is the reason for the season" pins. Luckily, we put two of them to good use. Hopefully I can find another use, or a good trashcan, for the other one.
We also made this pennant out of the same paper we used for the other projects. 
We made a triangular template for the pennants, making sure that the top of the template had inverted corners so that when it was folded, the corners wouldn't poke out the sides of the triangle.
We strung the triangles together with ribbon and hung it behind the couple.
It was the focal point of the shower, enforcing the theme right as guests entered. 

Congratulations, Josh & Laura! I hope your story truly ends with "happily ever after"!

Thursday, May 19, 2011

Fruit of the Spirits Not A.... Chiquita Banana!

I am a master of kids songs. My years of helping with children's church and VBS equipped me well with crazy songs with motions that inevitably get stuck in my head for days after singing them. "Baby shark" and "Jesus in the boat" are great songs, but I think my favorite song is the fruit of the spirit one. It goes something like "Fruit of the Spirit's not a (insert fruit here, i.e. Chiquita banana). If you wanna be a (insert fruit), might as well hear it - can't be a fruit of the spirit. Fruits are (reallllyyyy fast): love, joy, peace, patience, kindness, goodness, faithfulness, gentleness, self control. Oooohhhh!" Repeat. This song gets really fun when you start going through fruits and doing the motions associated with each one. "Prune" is always entertaining.

You may be asking why on earth I'm posting about a VBS song on my blog. Well, friend, since you asked, I just made some new decor for my apartment, decor which displays all 9 fruits of the spirit. In order to make said decor, I had to sing the fruit of the spirit song to remember all the fruit of the spirits, in order, about 74 times. So it'll probably be stuck in my head for the next 6 days or so.

Enough about the song, here's how I made it.
First, I bought 9 of these 10" x 10" canvases. They're the canvases that are wrapped around a wooden frame, so they have some dimension to them. 
Then, I bought 9 different acrylic paints - one for each canvas. I really wanted to use watercolor paints, but holy cow - $11.99 for a 1 ounce watercolor paint bottle is too rich for my blood, so I kinda sorta turned my acrylic into watercolor. 
To make my paint "watercolor," I used about a scant tablespoon of my acrylic paint (I have no other measurement references outside of the kitchen)...
Added about 5 or 6 drops of water...
And stirred. It's definitely not as thin as watercolor, but it worked really well! If I were to do this project over again, I'd probably add more like 8 or 9 drops of water to really make it more like watercolor paint. Also, the paint gets bubbly after this process, but its okay - the bubbles don't show up on the canvas.
I really like the effect the "watercolor" gave. It almost seems grainy to me, which I love.
After I was done painting the canvases, I broke out this baby. If you've never heard of a cricut (pronounced "cricket"), do yourself a favor and check them out. They're phenomenal. They're not cheap, but they're totally worth it (granted, this coming from the girl who's allowed to use it anytime for free, since my mom is cool and has one). I've got more cricut projects to post later. Get excited.
For this project, I decided to use the Plantin Schoolbook cartridge. I just wanted simple, Times New Romanish, lower case letters. 
I tested out my letters with some black card stock to make sure the size and font were exactly what I was looking for.
Success! Just what I wanted.

Instead of having to glue a million, give or take, letters down to canvas, I (once again, I mean my mom) bought some white vinyl to use at the letters. It's basically a big sheet of sticker material, so when you cut out the design you want with the cricut, you can peel off the design and put it on your project. It's awesome.
Before I cut out all my letters, I wanted to get the placement of the canvases just right. I wasn't crazy about any of the more random placements.
I liked this placement the best because of the almost rainbow scheme, but I didn't really care for the grey canvas. So, I painted over it with white paint and mixed up my own turquoise color! That's the beauty of this project - it's really hard to go wrong or mess up. Even if you do mess up, you can easily paint over your mistake.
I finally nailed the rainbow color scheme down and made my first canvas with the white vinyl. I love it! (Punny.)
This is the final project. I couldn't be happier about how it turned out. Since I'll be in a somewhat eclectic apartment next year, I think it'll match everything. Not to mention its a great reminder of the fruits of the spirit! And the cursed song that'll be stuck in my head for the next year while these look adorable in my living room.